Click on the below-provided link to proceed.
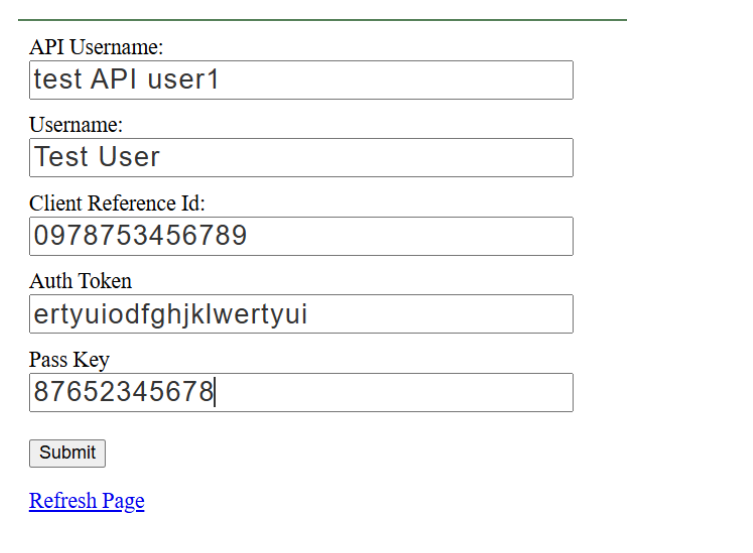
Then provide the following details wherever needed-
|
Token - your encrypted token
API Username - isutest222 Username - aepsTestR pass_key - your pass_key |
Provide the API user name, User name, Client reference ID, Auth Token, and Pass Key, then click on Submit to start the Process.
Once you click on Submit, you will be redirected to the e-Signature portal Home page.
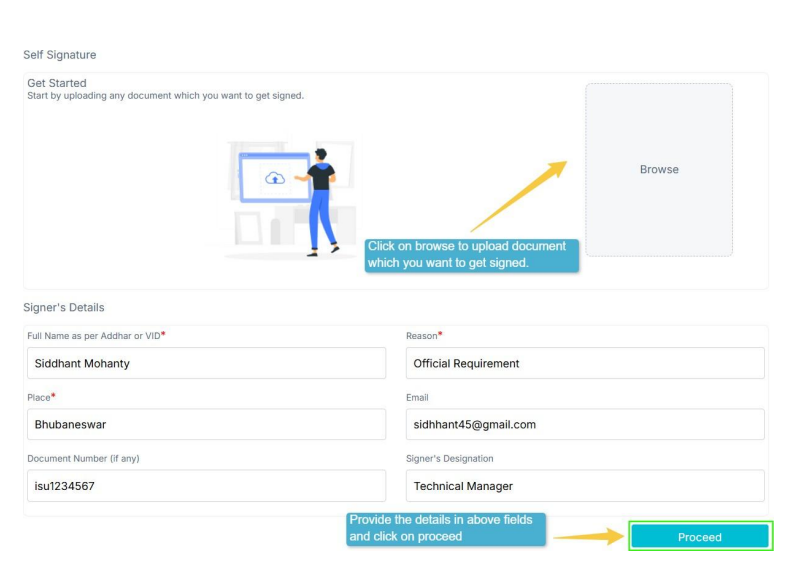
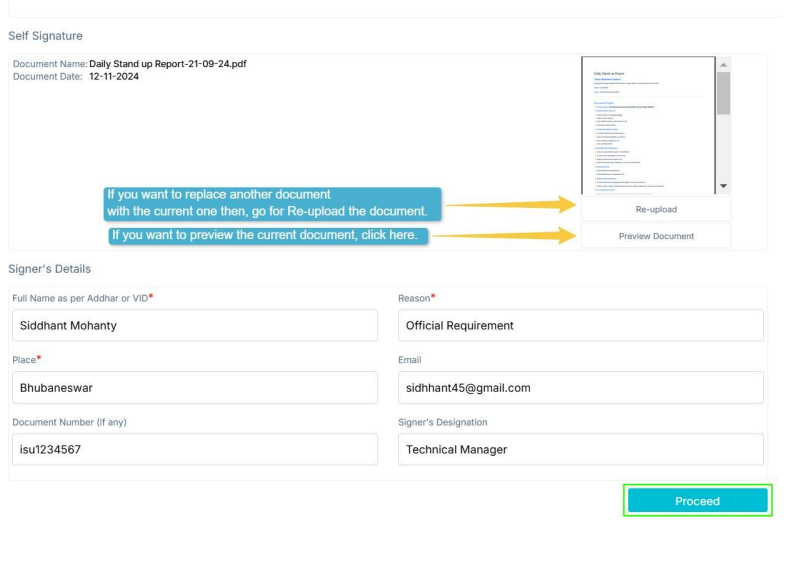
Fill all the fields in Signer’s details section and click on Proceed as shown in the image below.
(Must fill in the fields that are set as mandatory.)
To add the ‘Sign’ to your document, drag it and drop in which part it needs to be updated.
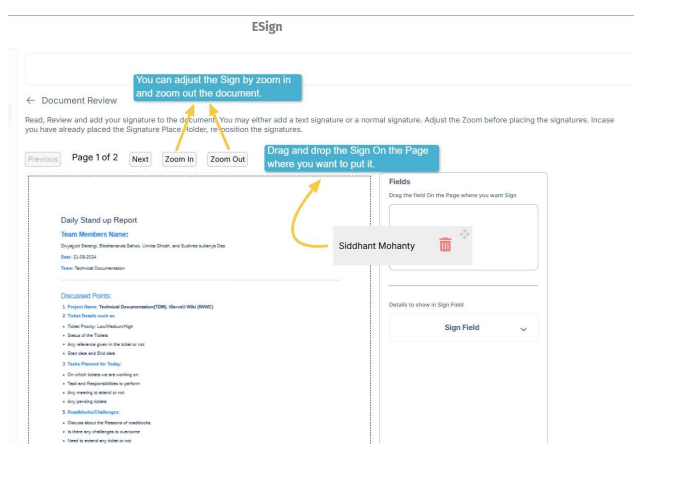
Drag and drop the field successfully.
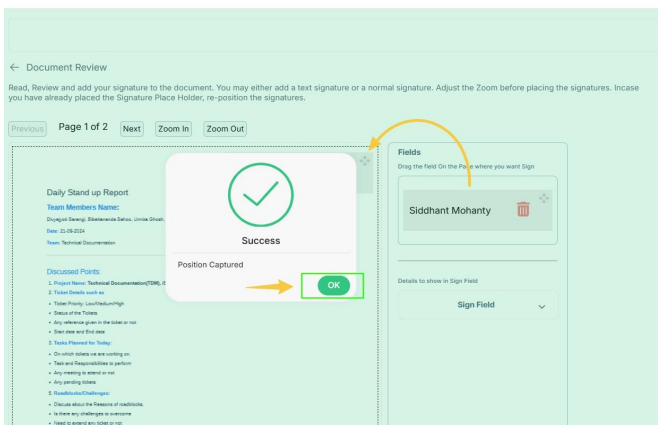
Once you drop the Signature at your desired place, you can choose the Signature mode.
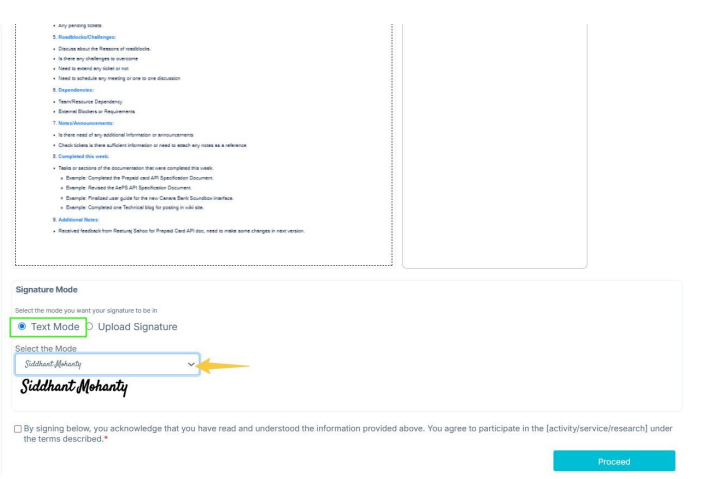
Click on the drop-down list as shown in the figure.
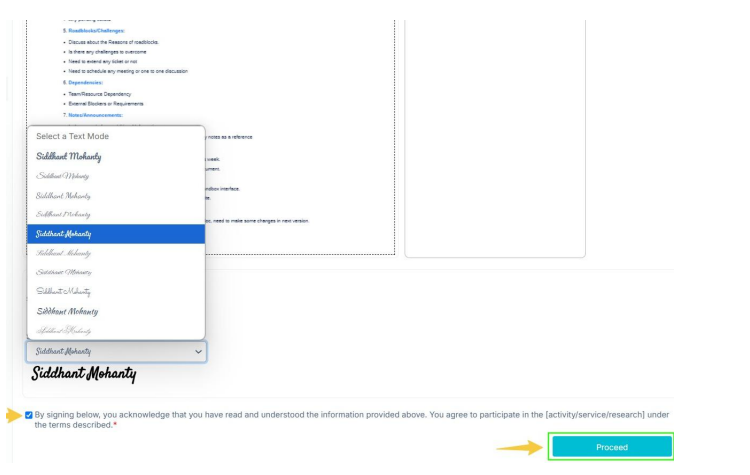
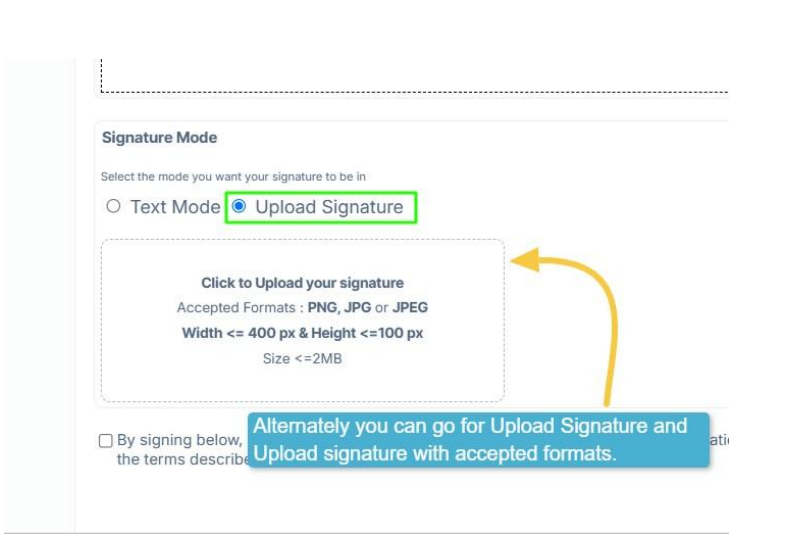
You can Upload a desired signature style with an image format (.png, .jpeg, .jpg) that accepts the following criteria.
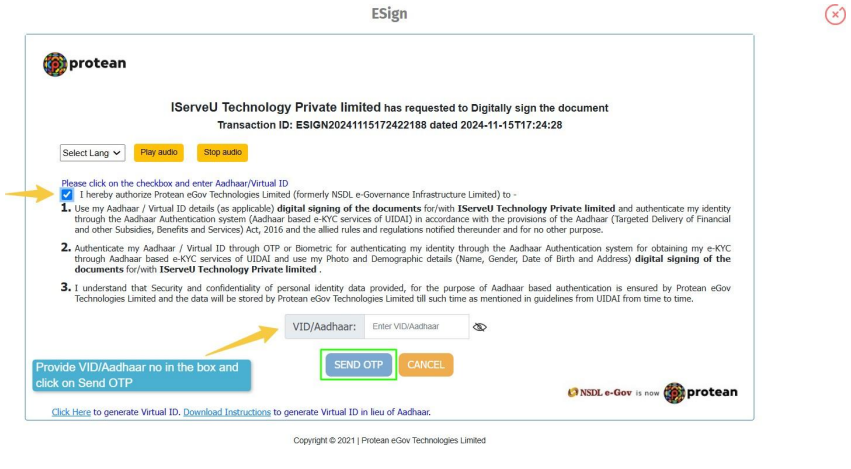
Put a tick on the checkbox and enter your Aadhaar/Virtual ID. Once you have entered the Aadhhar details, click on Send OTP.
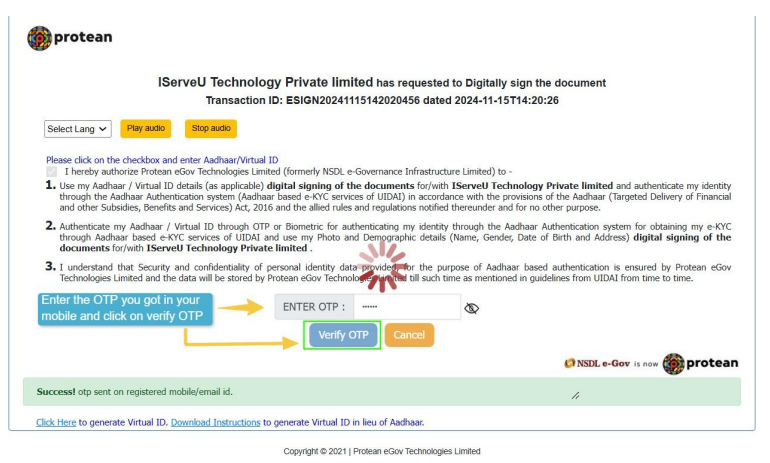
Once you provide the OTP, click on Verify OTP that you have got in your inbox or e-mail.
After the OTP is verified, Sign success pop-up will be displayed.
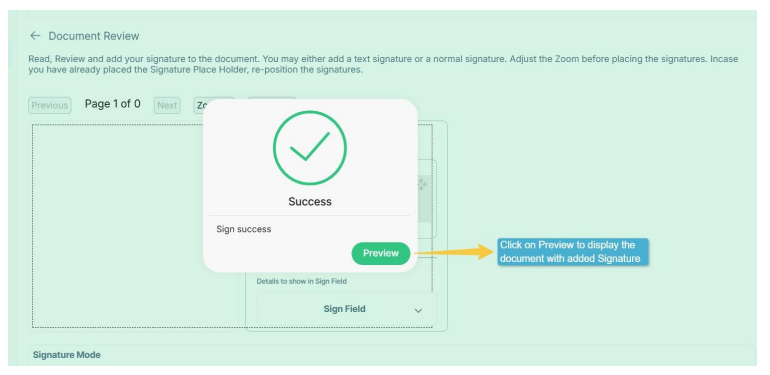
Click on Preview to view the document with the added signature.
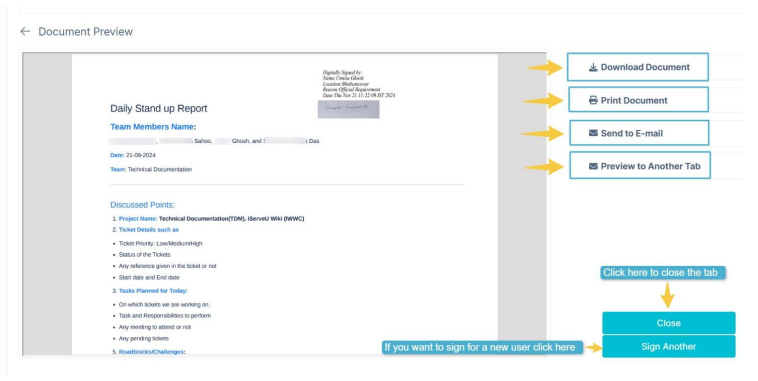
On the document preview page, you can download the document, print the document, directly send it to a mail, and preview it to another tab.
Then click on Close to close the tab. Moreover, by clicking on ‘Sign Another’, you can go for another sign process from this page.
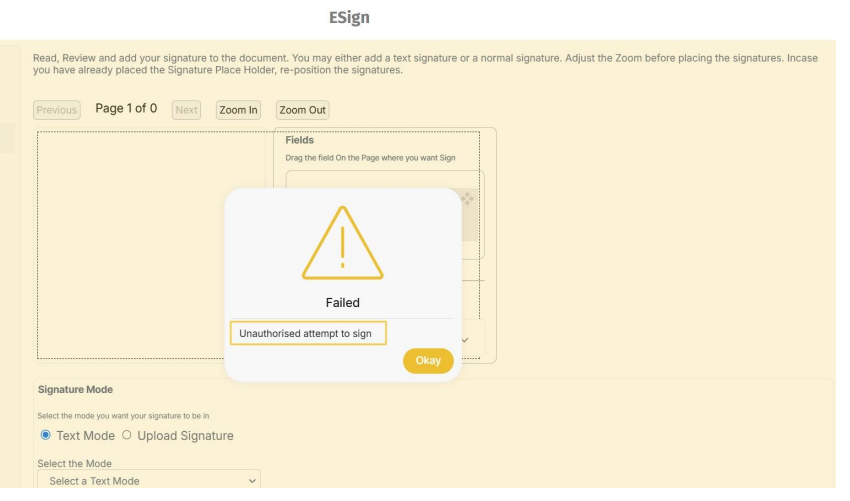
Sometimes, you may get a failed result page, like the one displayed below, if you provide an invalid Aadhaar number or OTP.
